New to Measure? Read Core Concepts first for an overview of key terms and entities. For a deeper billing integration via the API, see the API Quickstart.
Measure dashboard: app.getmeasure.com
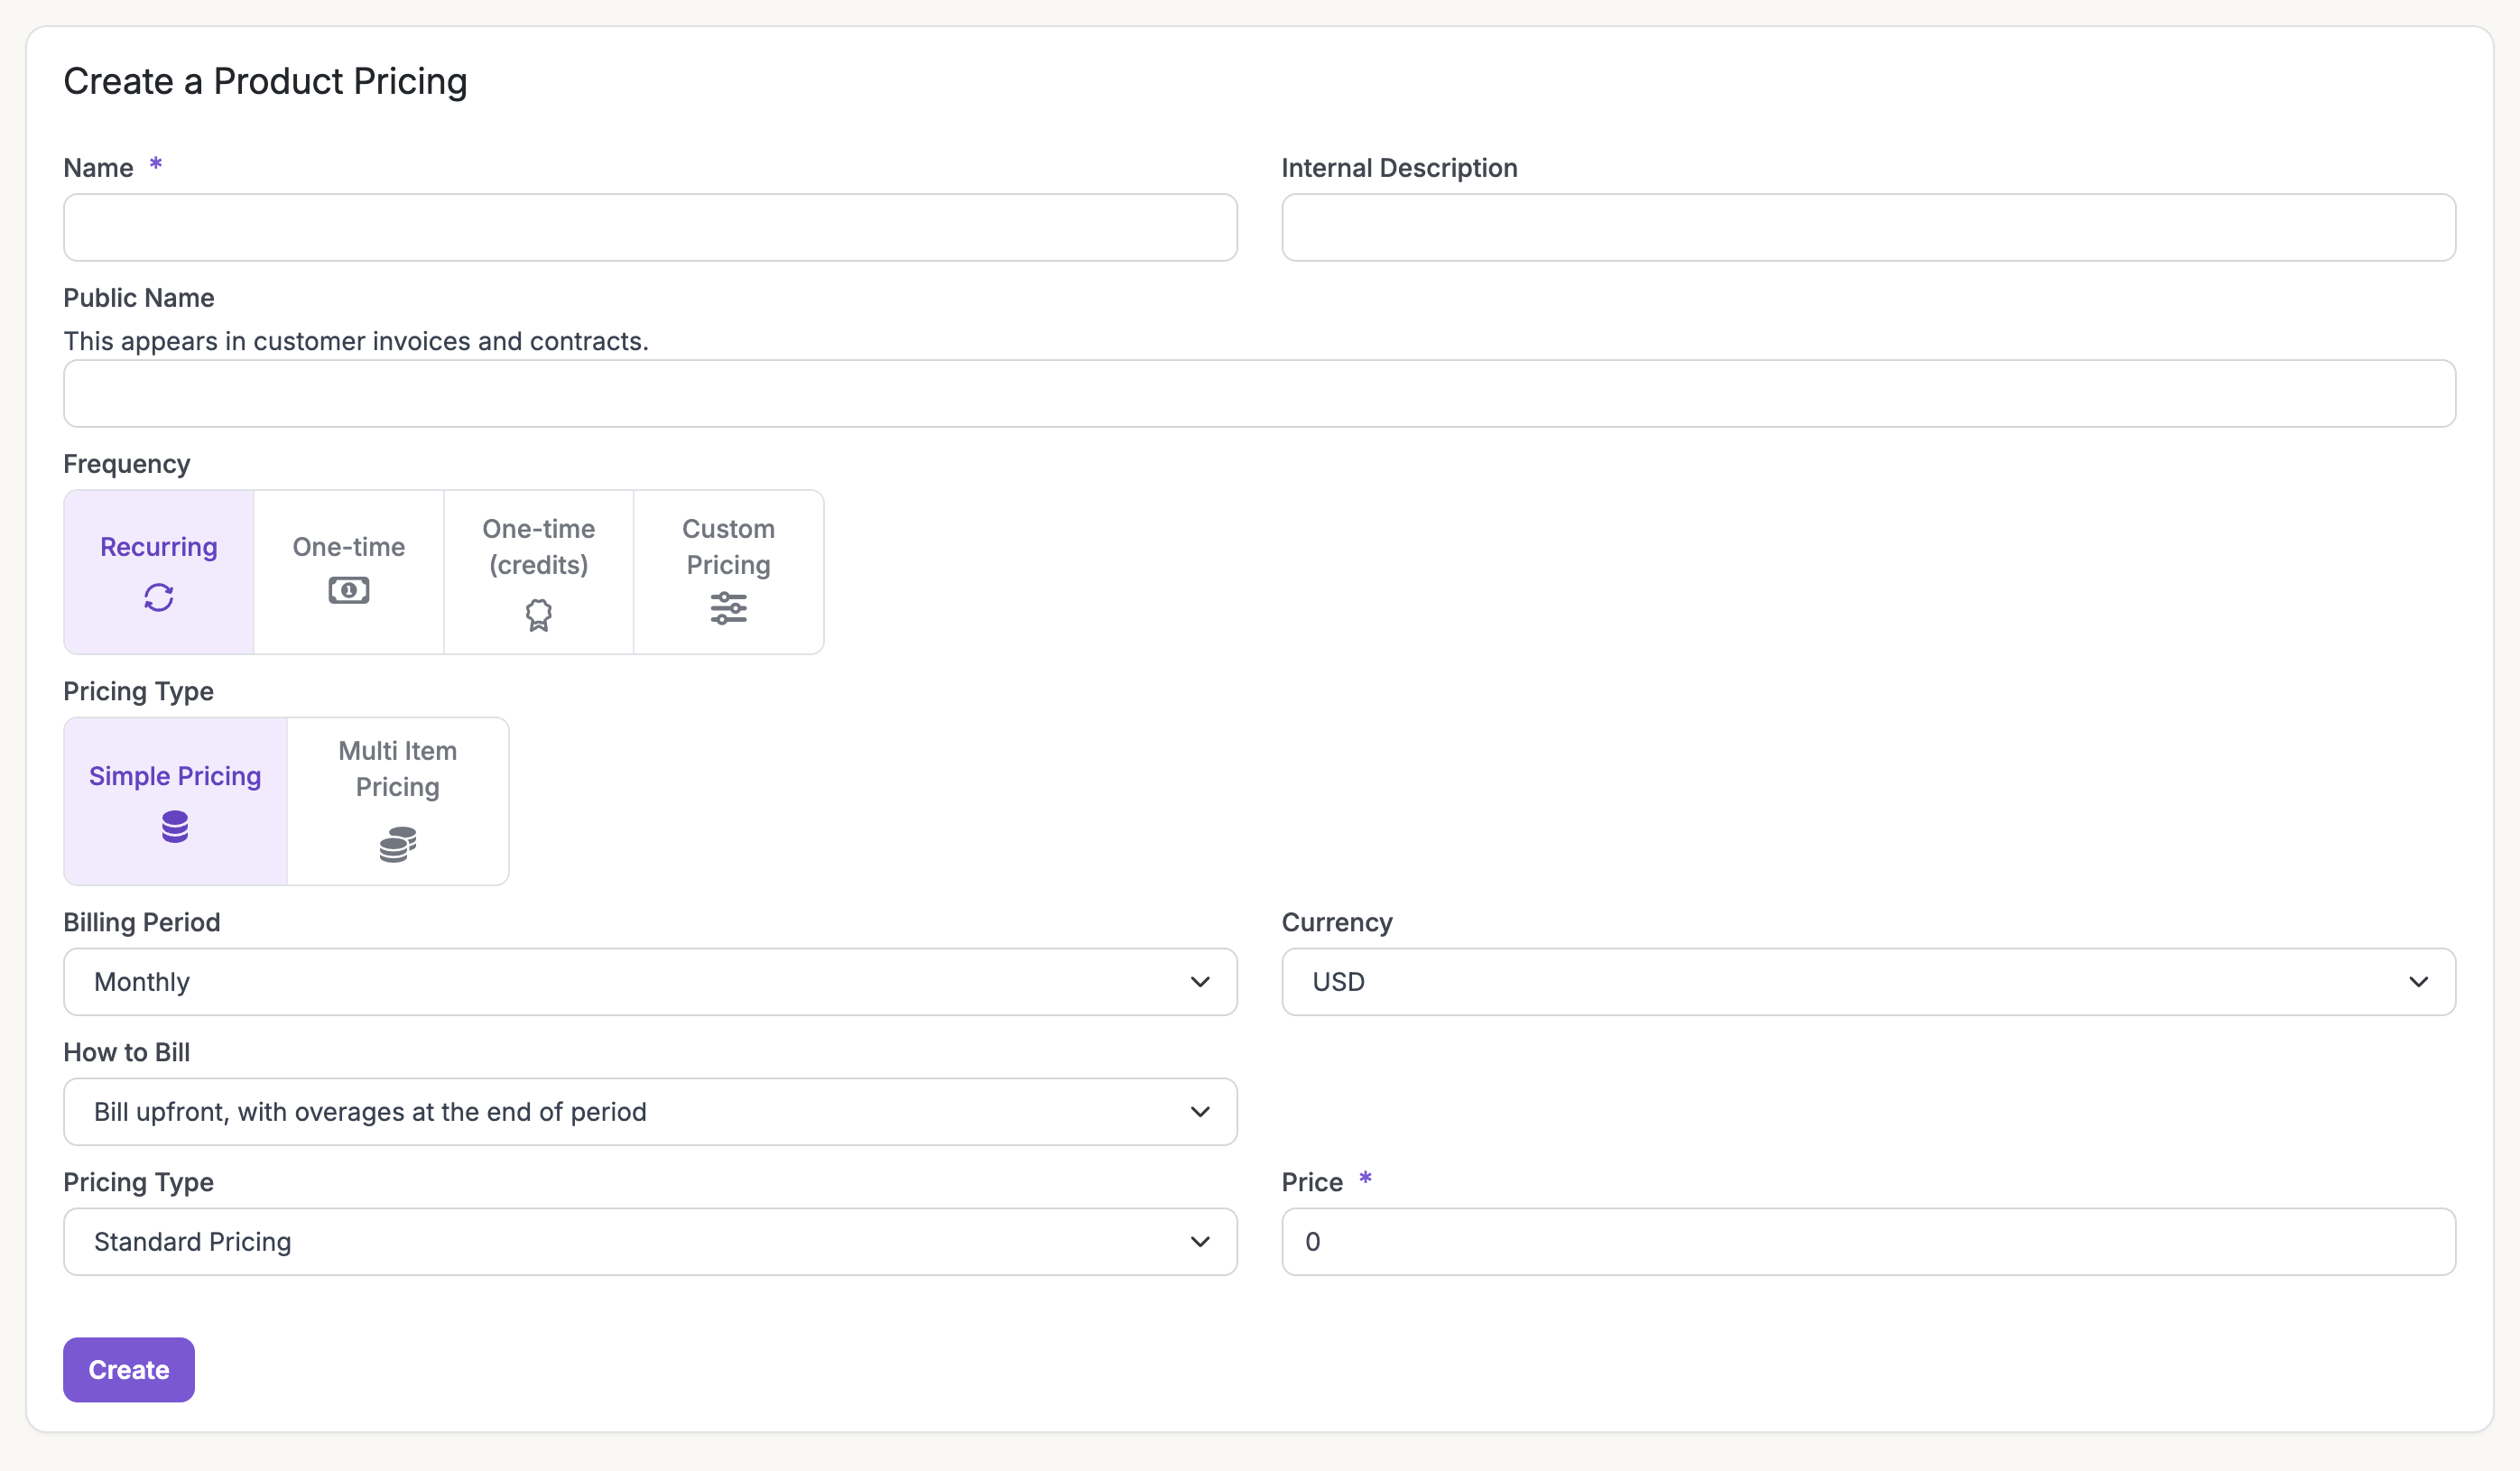
Create a Product and Pricing
Build your product and pricing catalog in Measure.Go to the Measure dashboard → Products → Overview → Add New Product.
Set Up Your Payment Provider
Connect a payment provider so Measure can charge invoices.Go to Integrations and click Connect on Stripe (or another supported provider). Complete the connection flow to link your account.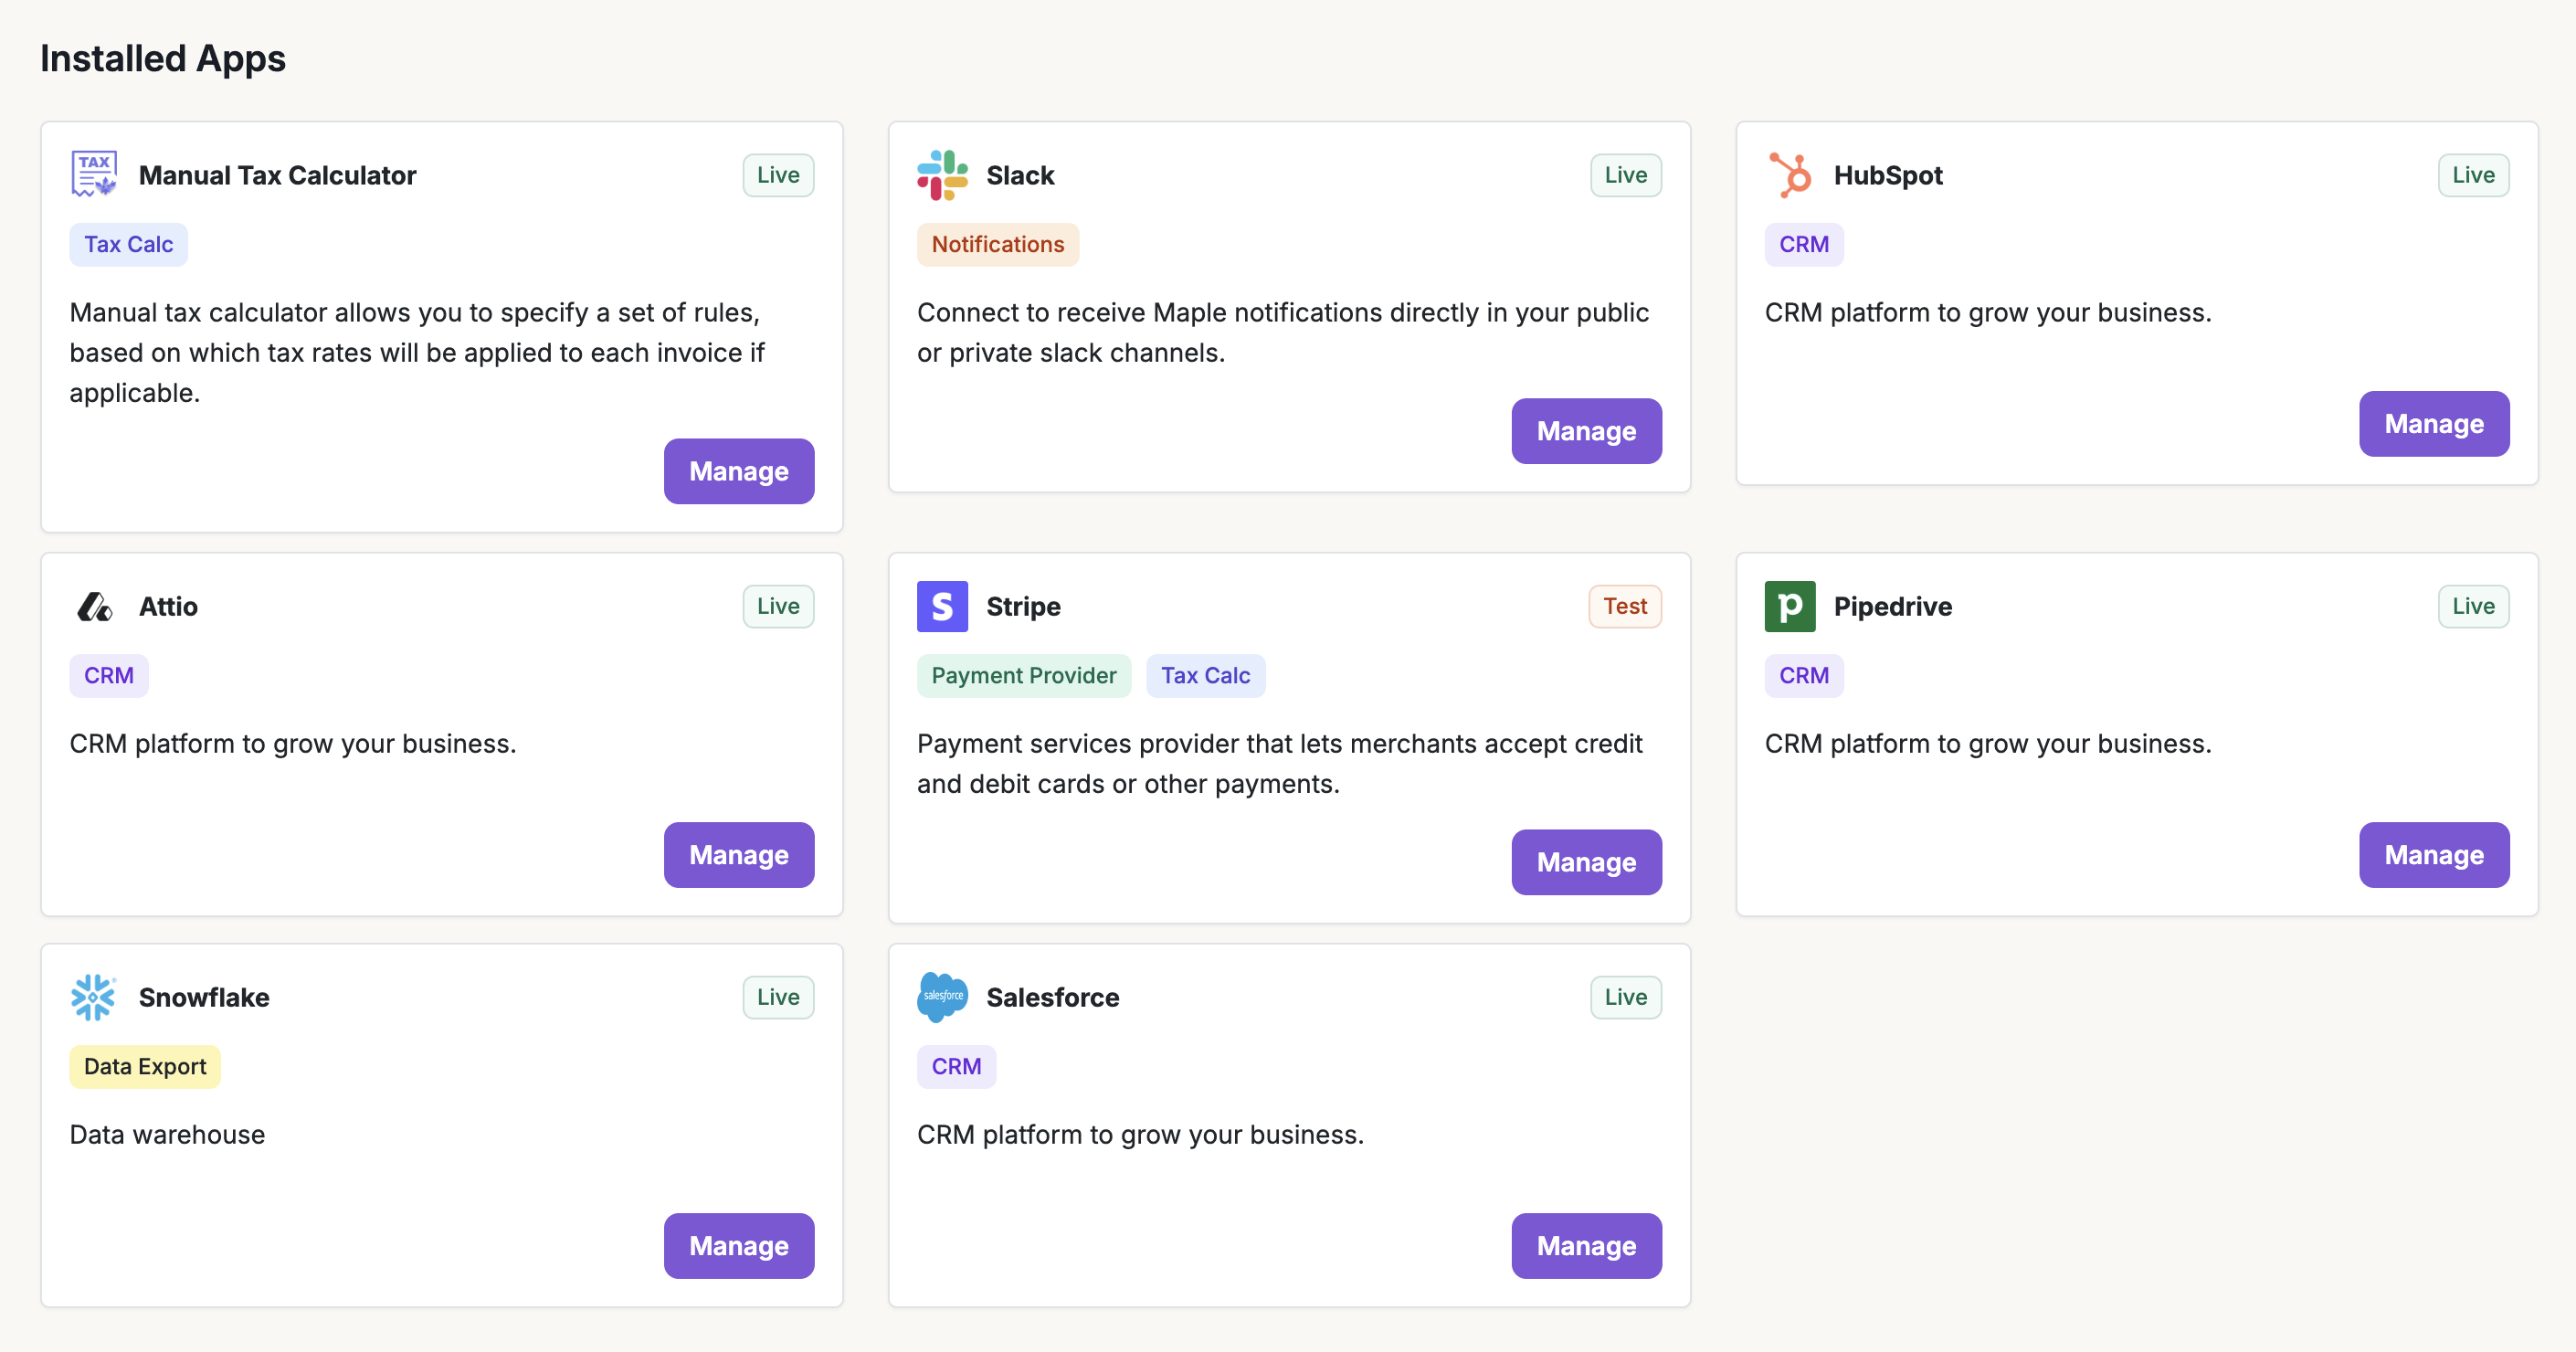
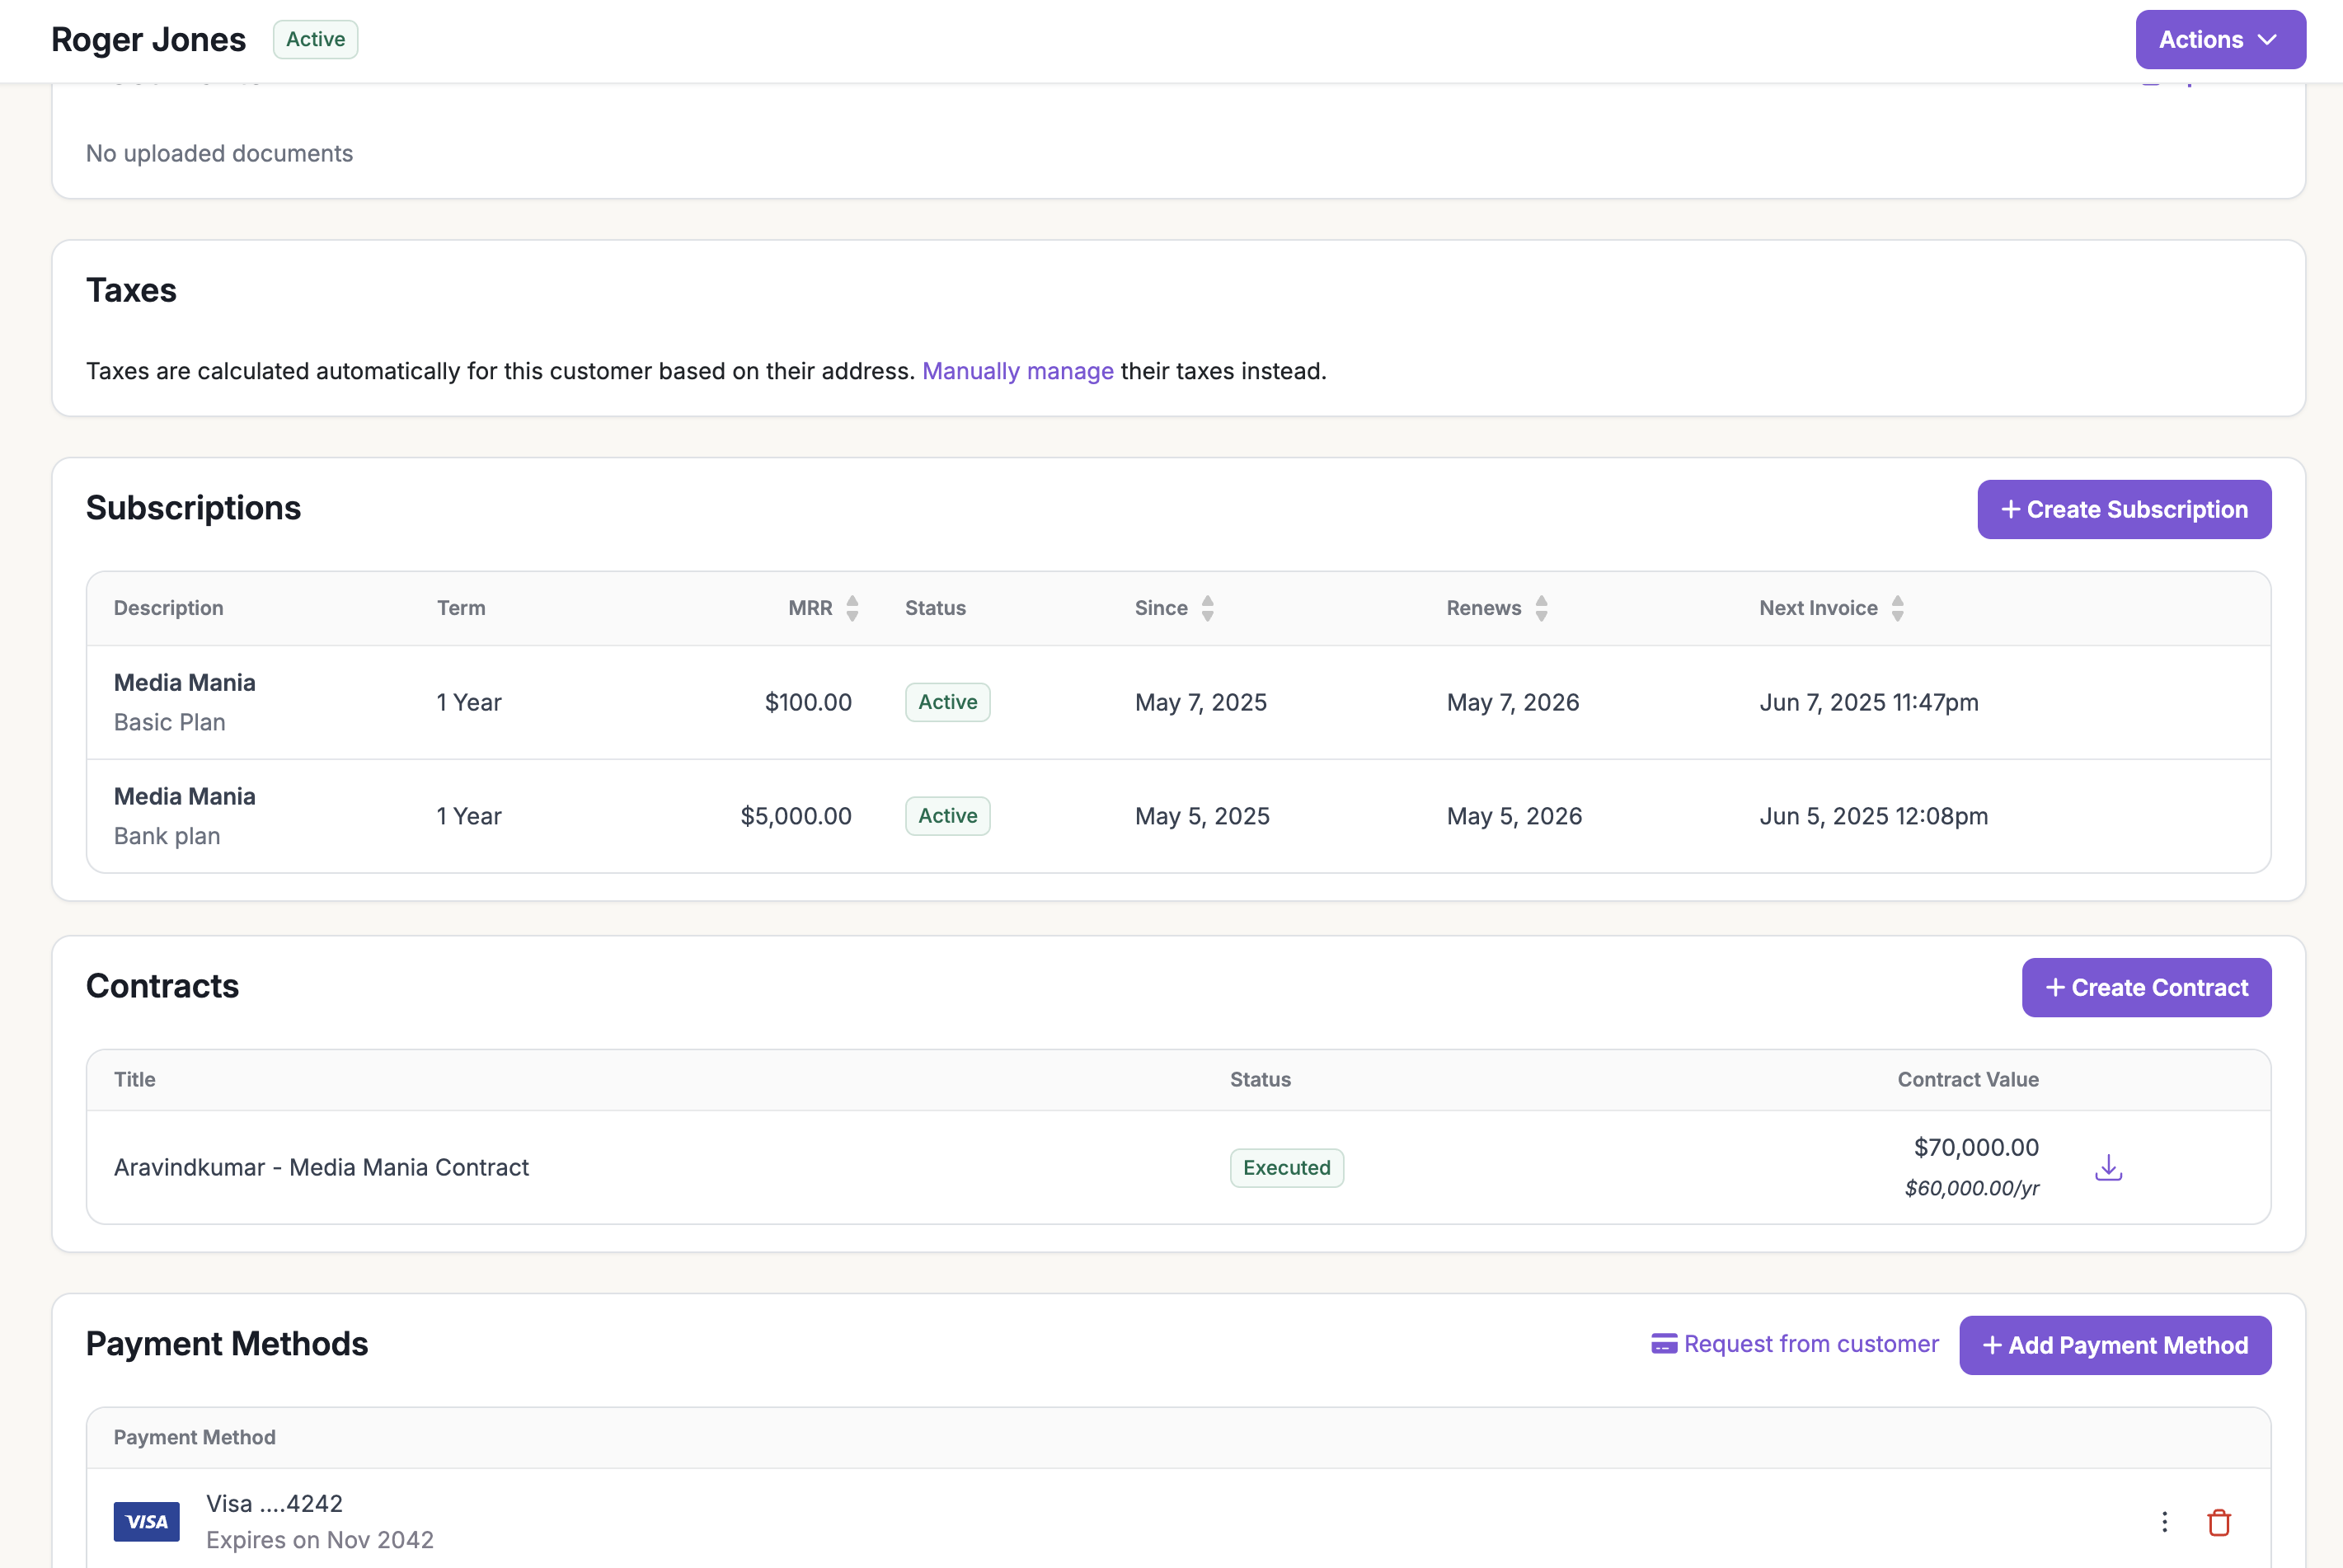
Create a Customer and Subscription
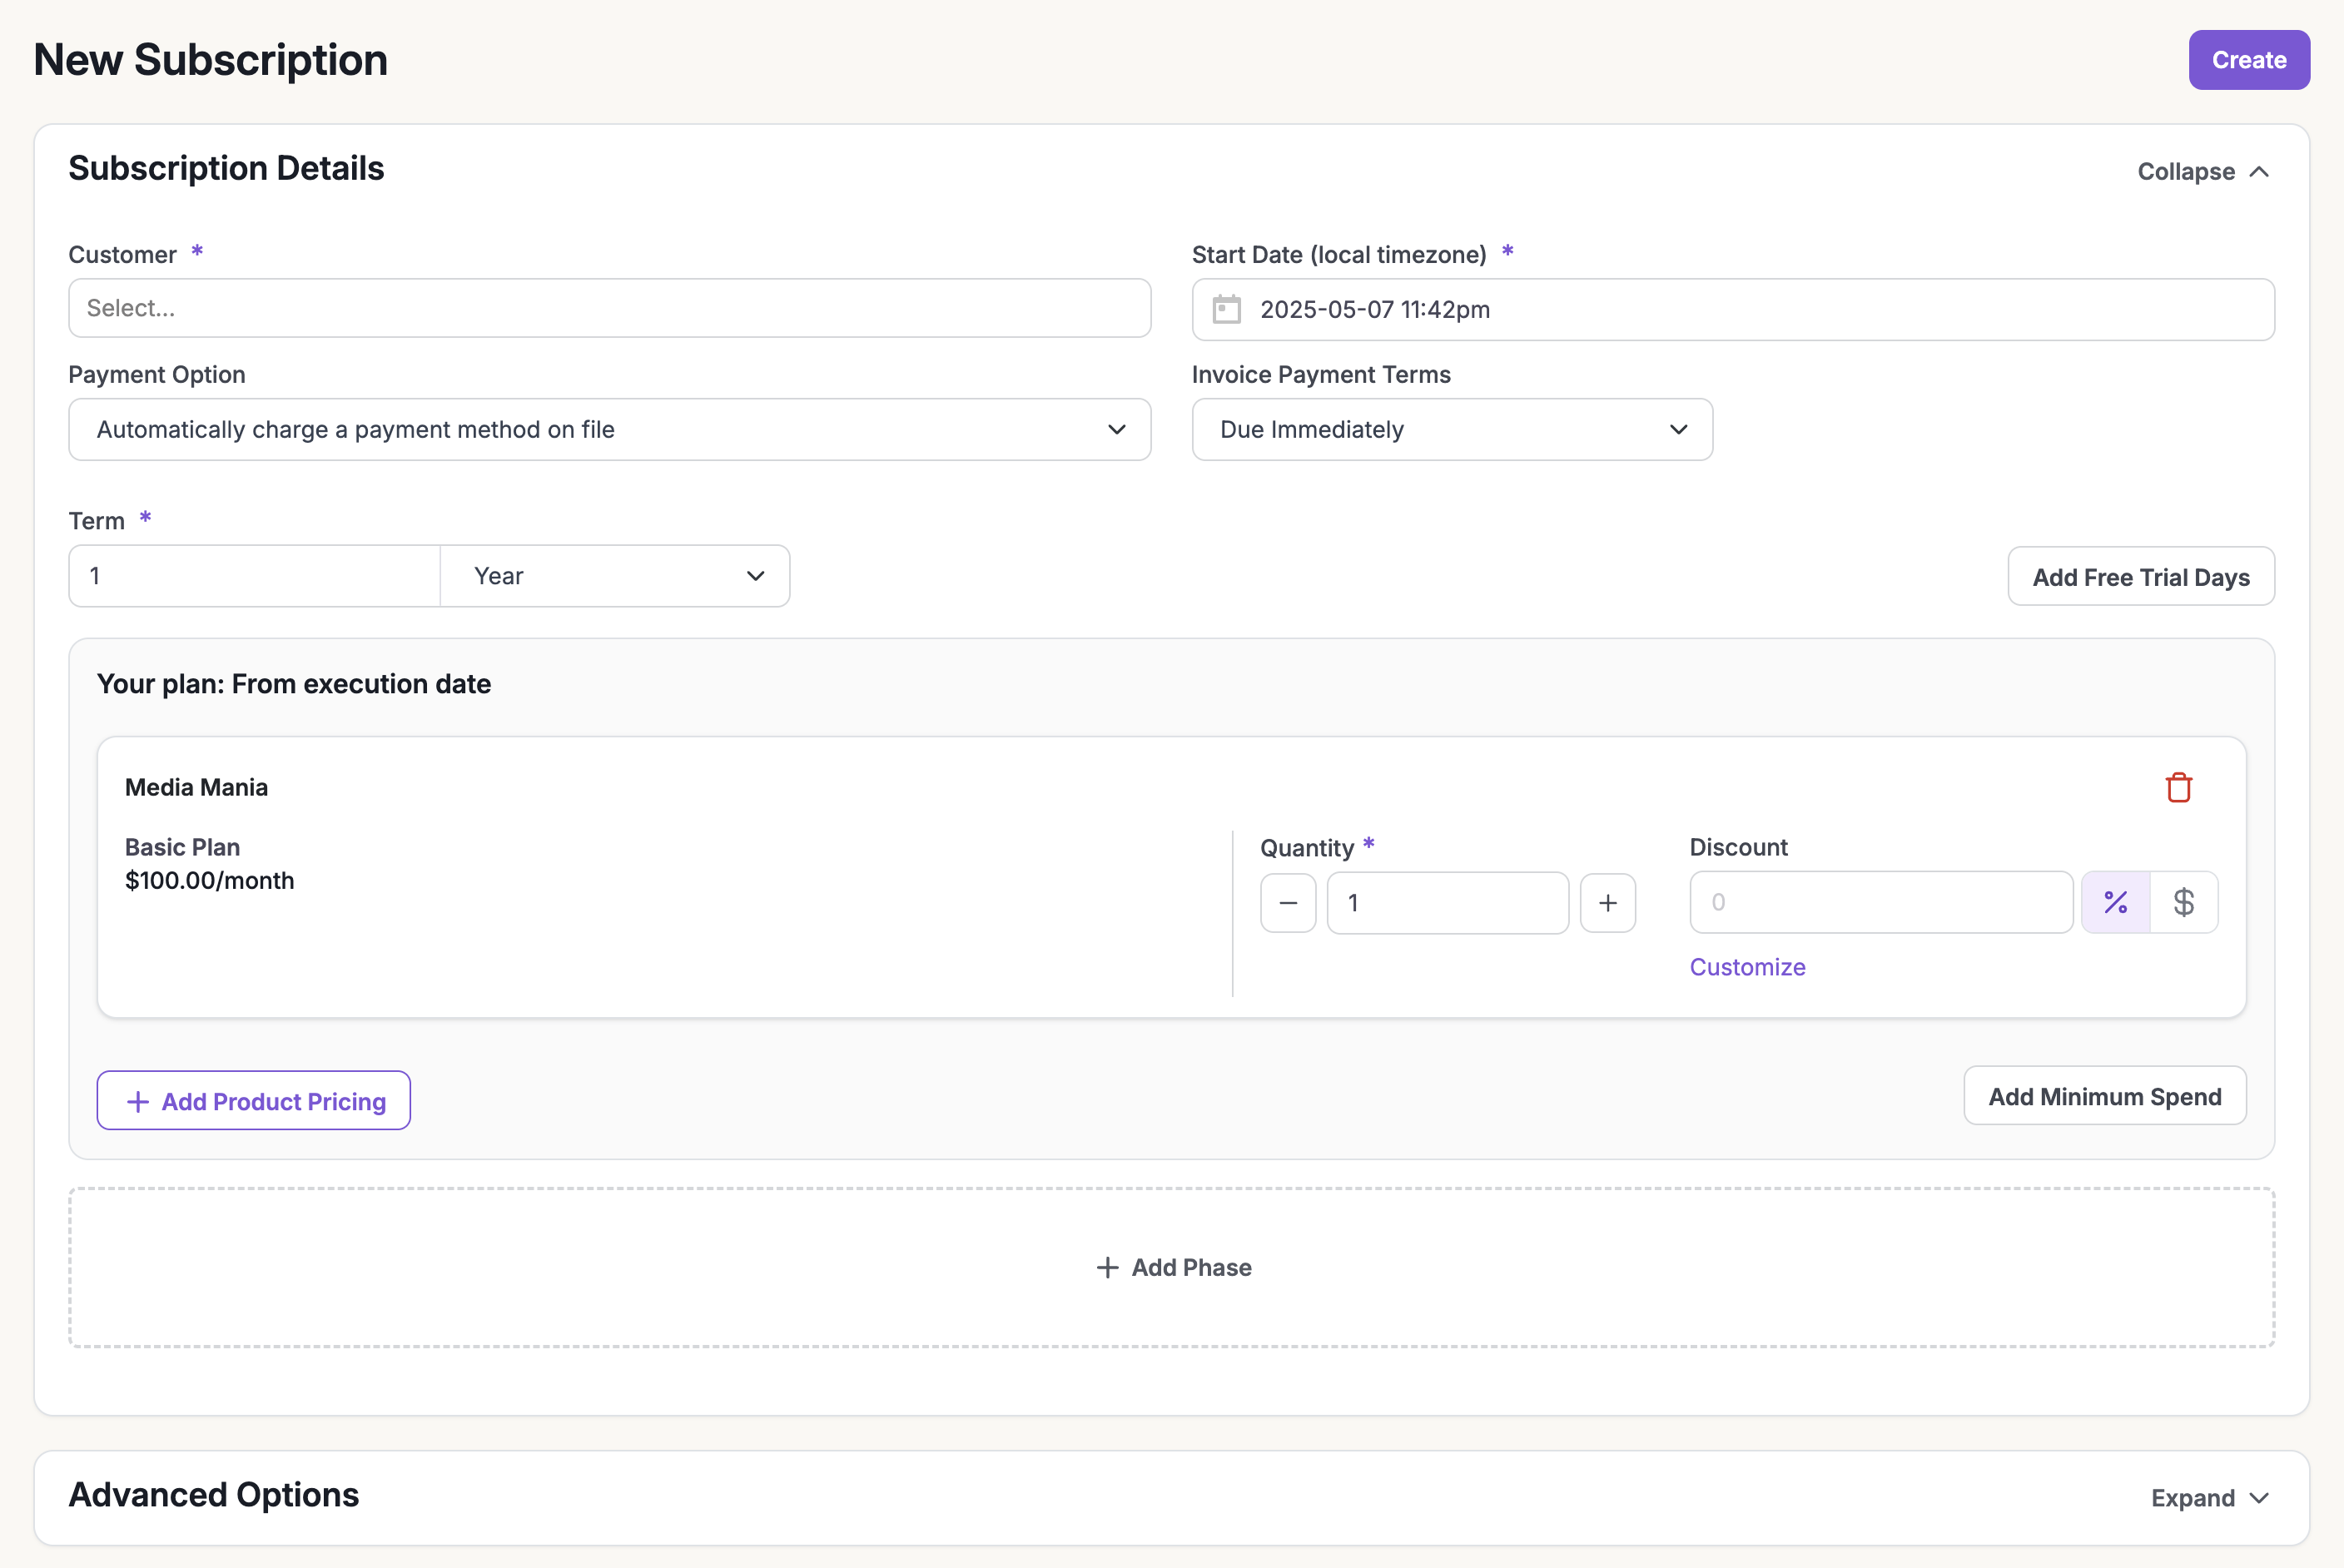
Create a customer, then attach a subscription to start billing.Go to Customers → Create Customer, add the customer details, and click Add Customer.Go to Subscriptions → Create New Subscription, choose the customer, and click Create Subscription.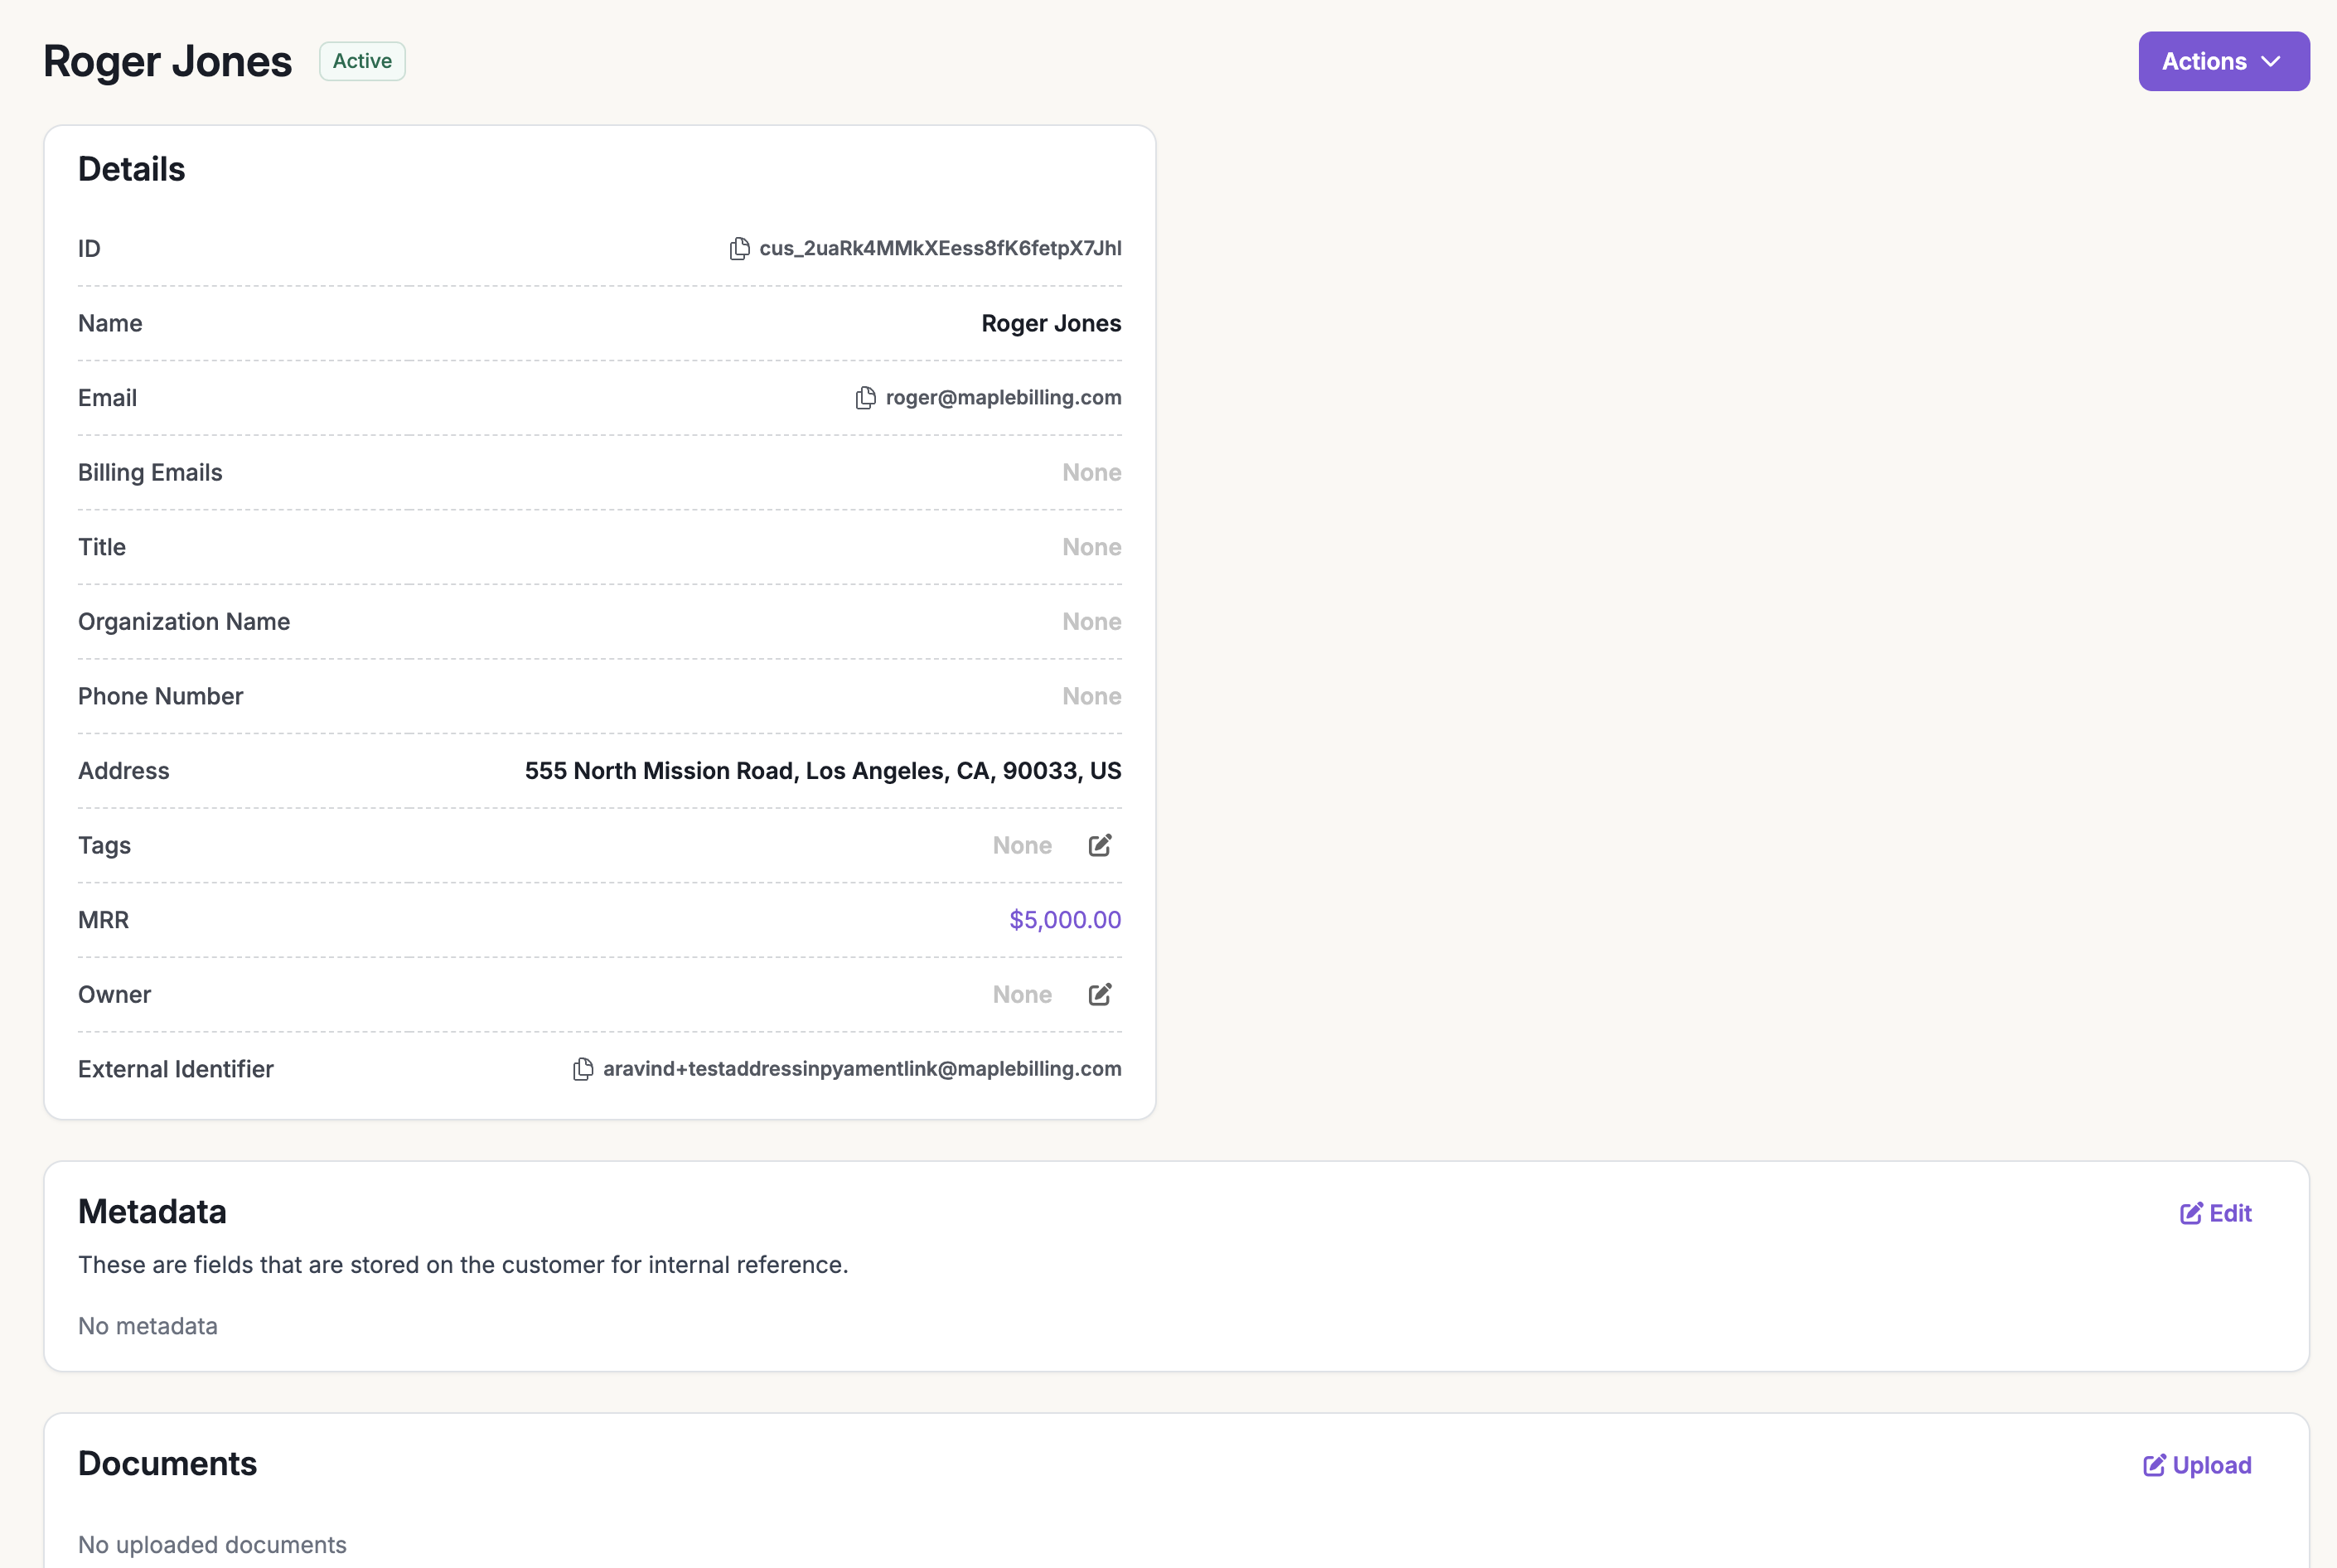
Review Your First Invoice and Preview the Next
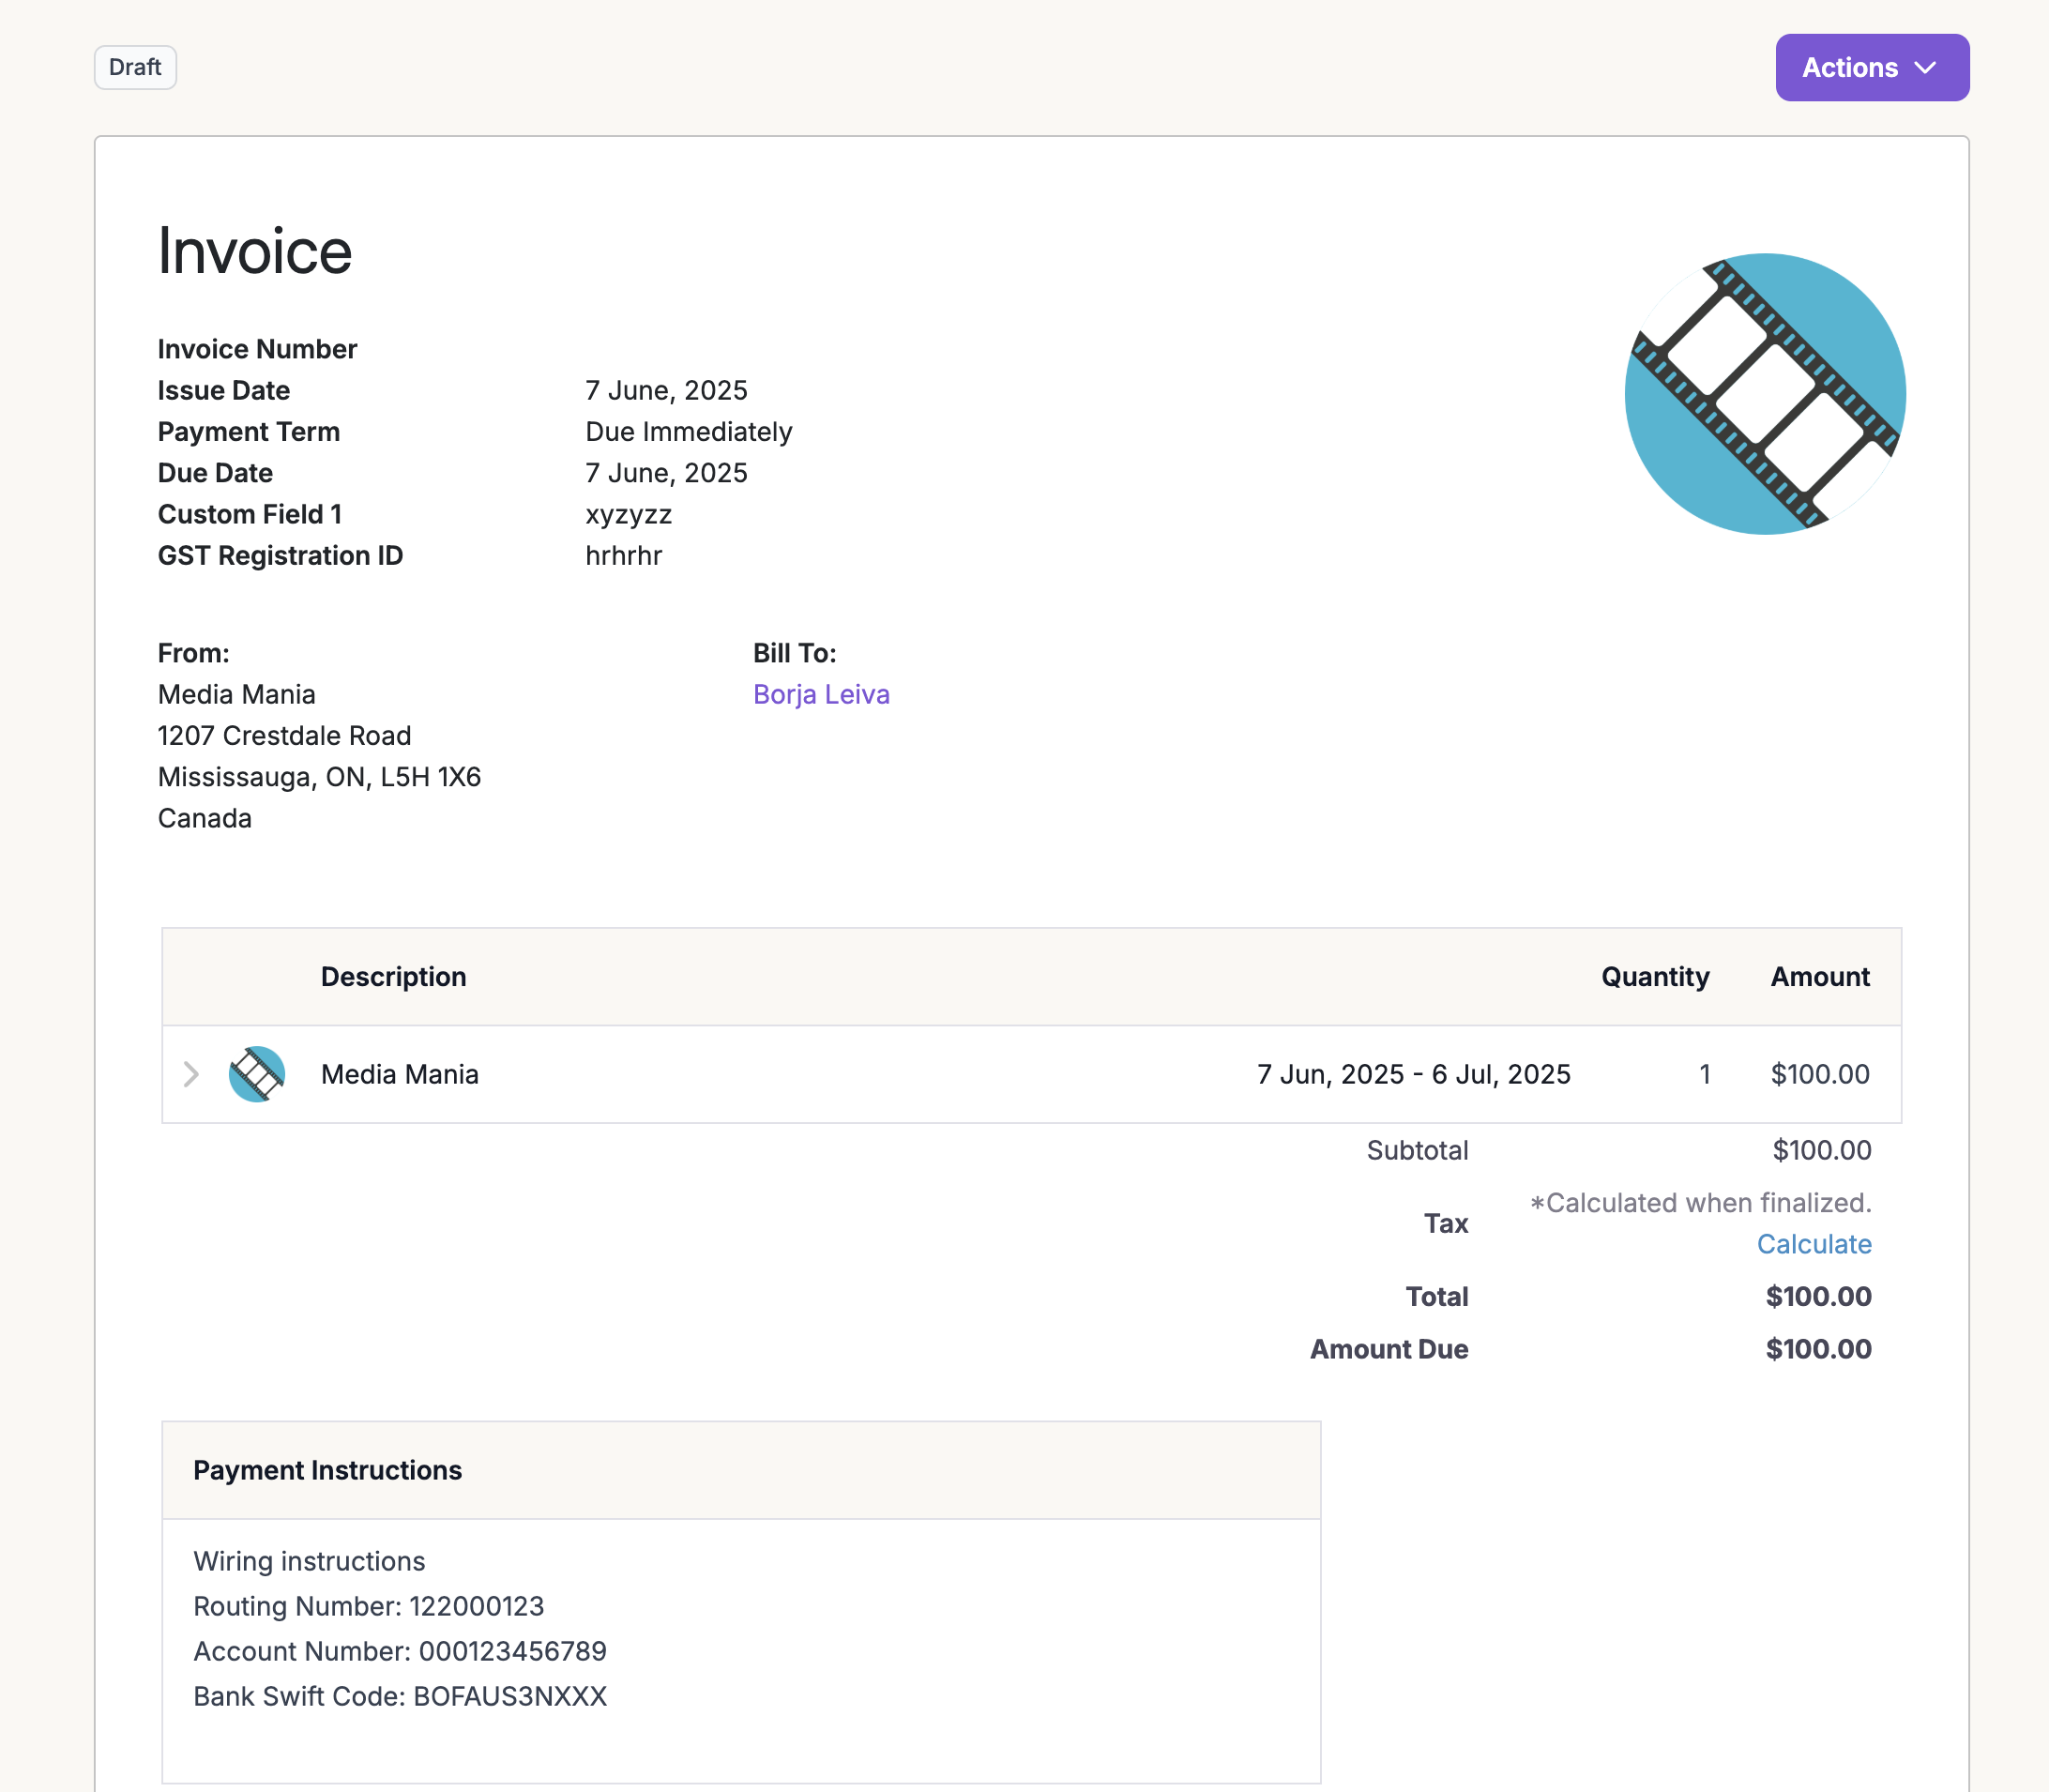
When the subscription is created, the first invoice is generated and you get a preview of the next invoice.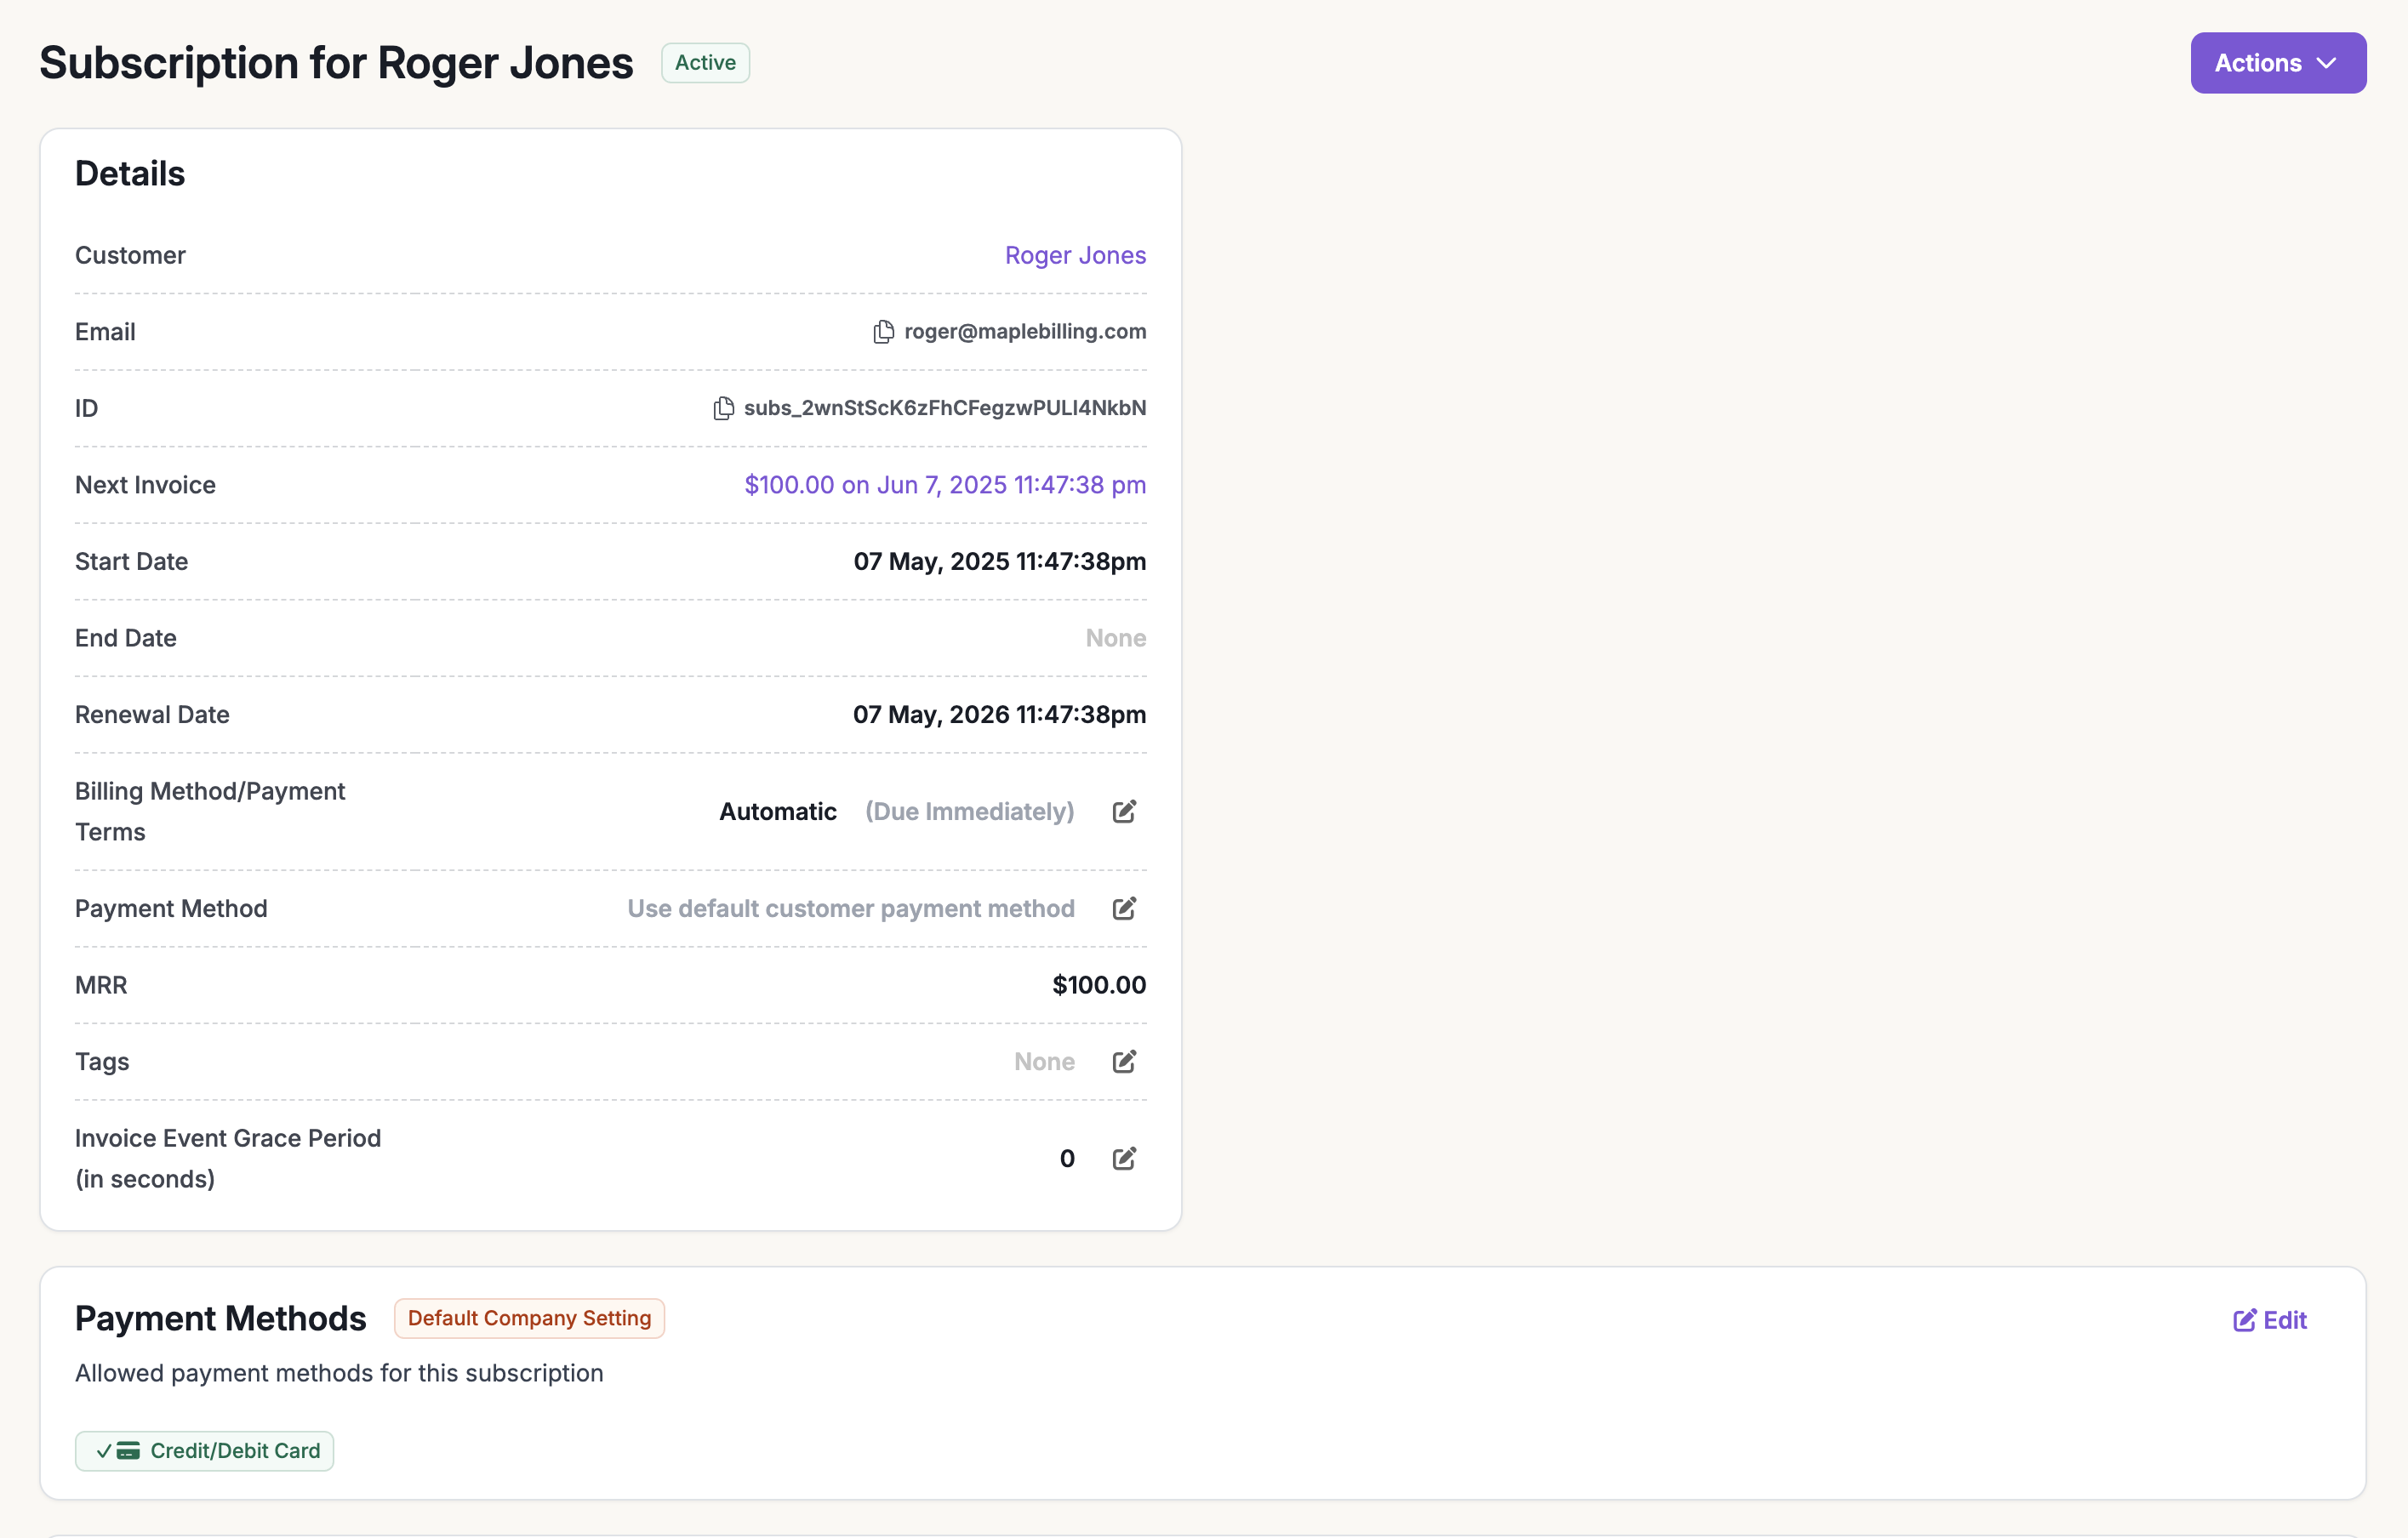
You now have a live subscription, an issued invoice, and (with auto-charge) a completed payment. For more, see Invoicing.
Next Steps
API Quickstart
Create customers, subscriptions, and invoices via the Measure API
Invoicing
Create, edit, and issue invoices and credit notes
Billable metrics
Set up usage-based and object-based billing
Core concepts
Review key entities and workflows in Measure